Install ESXi 4.0 on VMware Workstation 9
Today i am creating documentation for how to install ESXi in VMWare workstation 9.
VMware ESXi is a bare metal and smaller footprint version of ESX that does not include ESX's Service Console. It is available as a free download from VMware though certain features are disabled without the purchase of a vCenter license.
- Before installing ESXi server in Your VMWare workstation, pls enable Intel VT Technology from BIOS of your Laptop/Desktop/Server.
- If you don’t vmware account please create from below link. https://my.vmware.com/web/vmware/registration
- Once create account or login from existing account download ESXi ISO image from VMWare official website https://my.vmware.com/group/vmware/info?slug=datacenter_cloud_infrastructure/vmwar e_vsphere_hypervisor_esxi/4_
- Go to VMWare Workstation Select Tab from FILE -->New Virtual Machine
- Select Typical from New Virtual Machine Wizard

detect type of OS.

7. Click Next

8. Now the virtual machine is ready, but we have to customize hardware, Uncheck Power on this virtual machacine and click Finish


10. ESXi 4.0 minimum 2GB RAM is required leave it as a default, from processor option check Virtualized Intel VT-x /ETP is check (Enabled) or not.

12. Power on the Virtual Machine. Select ESXi Installer and press ENTER.


16. Press F11 to install ESXi


18. Installation is completed successfully. See the welcome screen of ESXi server. Next step is configuring ESXi server.

19. Press F2 is to Customize ESXi system, change password of ESXi server. Press Enter to Change Password from the new window.

21. From Configure Management Network option, you can add more nic cards; modify IPV4, DNS, and Hostname.
21.1 From the Network Adapter add or remove nic cards.21.2 VLAN is optional leave it now
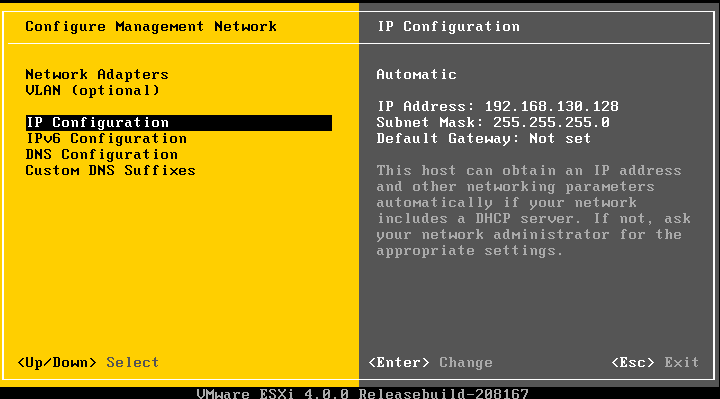
22.Change IP Address of ESXi server as your network team given to you.
Select option Set Static IP address and network configuration; Change ip
address press enter to save the changes.

23. IPV6 leave as default setting.
24. DNS Configuration- Change DNS server address and Hostname.

25. Leave custom DNS Suffixes. Press esc it asks changes to be save. Press Yes.

No comments:
Post a Comment